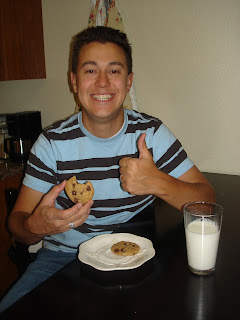
I have struggled with chocolate chip cookies for years. You see, I love them. Like, I REALLY LOVE them. The problem is mine never turn out that great. They are usually flat. I like a thicker, chewy yummy cookie. Not a super flat cookie. I have always used the Nestle recipe.
I always see and eat some great cookies. Everyone always says, "So-and-so makes THE BEST choc chip cookies". Yet I never have these awesome recipes or it never works out quite like it was supposed to.
And then there's the whole baking verses cooking dilemma. Cooking is so much more forgiving. You can throw stuff in a pot or on a grill or in a skillet and you can guestimate and season "to taste". Baking is so precise. The little things matter. I don't even know how many times I have had to start over when making pie crust dough because it wouldn't roll out correctly. And flat cookies? Yes - it's a matter of perfection in baking.
So.
I have this cookbook. Anyone ever watch "America's Test Kitchen"? You should. It rocks.
Anyway, the cookbook. Basically, it tries to find the "best" way to make staple recipes. It's rather scientific, they try recipes multiple times - like sometimes over 50 different ways, to find the perfect combination of flavor and consistency. So, I thought, surely they have a good chocolate cookie recipe!
So I researched. I found out several things about getting thicker cookies that don't flatten. Things like chilling the dough for an hour before baking. Or making sure the butter is around 65ish degrees before using it, and making sure the eggs are at room temperature.
So, I decided to definitely try this out.
Here's the recipe:
So this recipe was normal in that you first mix the dry ingredients and set aside. But the butter was different. The recipe says to melt the butter and then let it cool until it is just warm. The butter looked like this:
In order to get the eggs at room temp, they can be set out for an hour or so, or placed in hot water for for 5 minutes. The recipe only calls for one egg and one yolk, but I have free range local eggs, and some have two yolks so I set out 3 to make sure 2 of them were normal eggs. I opted for the 5 minute route:
So, you combine the sugars and butter in the mixer and mix on low speed until mixed. So, basically, you let your mixer do the work. I LOVE my mixer so I am including a photo. Growing up I was always told, to have a perfect working kitchen you have to have a Cuisinart food processor and a KitchenAid mixer. (of course you don't really HAVE to, but I LOVE mine). AND it's PINK!!! woo!!!!
Once the butter and sugars are mixed well, you put in the egg and yolk, and the vanilla and mix until combined. Then you pour in the dry ingredients until combined on low. It doesn't really take that long, and I think they want to make sure it isn't over beaten. The dough has a different texture/look than regular tollhouse dough. Is looks darker and is more oily, not as fluffy. See below:
Hmm.... not bad at all!
So then you stir in the chocolate chips:
Now I decided to try the technique of letting it chill for an hour (I did it maybe 40 minutes), even though the recipe didn't call for this. I'm sorry, but you CANNOT see the inside of my refrigerator at this point in my life. It's incredibly too embarrassing. Maybe if I clean it out. So here's a picture of the front of my refrigerator, with the dough chillin' inside (pun intended):
So, once the dough chilled they had a new technique to make the cookies aesthetically pleasing. Basically, you put the dough in 1/4 cup amounts and then roll it into a ball.
Then you tear the ball in half.

Then you put the two halves together so where the top part is not smooth:
Interesting, huh? and then you put them on greased/floured cookie sheets. I use a Pampered Chef baking stone and one of those silicone sheets on a baking sheet so I only floured them.
The cookies on the right are the large, 1/4 cup ones. the ones on the left are smaller ones. I wanted to have MORE cookies so I could share them! (-:
On baking.... they bake at 325 degrees. And there are supposed to be two racks, one at mid/high and one at mid/low. Halfway through backing, the sheets are switched from bottom rack to high and from front to bake for even baking. They are supposed to be baked for 15-18 minutes, until the outside is firming upand the inside is soft. I think I baked mine for 17 minutes. And the baking was VERY even. I'm impressed.
So I was really amazed when I watched them in the oven. They were not flat. I was rather astonished actually. They came out and looked great - evenly cooked, thick, good looking cookies! I was still skeptical and waited for them to cool. They are supposed to cool on the cookie sheets.
Okay, so the cookies turned out really good. Like I'm using this recipe from now on. They are thick, not flat, the flavoring is not too strong of butter or anything, and they are chewy and wonderful. I've had two today. Seriously, folks, you have to try these if you want the thick, gourmet cookie type chocolate chip cookie. They are also not hard to make. Surprisingly.
Also, Congrats again to Karen for winning the Mexican vanilla! YAY!!!! (-:
Happy Baking!
~Kathryn
PS - Brinkley went to the groomer yesterday and I thought you might want a pic:


YUM! I love chocolate chip cookies too...thanks for sharing the new recipe!
ReplyDeleteWow, who would have thought the details would matter that much? They look so yummy though!
ReplyDeleteWow - this is awesome! Now I have to go run out and buy that book, and a mixer, and a food processor, and a baking stone...and a..... ACK!
ReplyDeleteHope you're having a good week. (visiting from SITS).
- Margaret
Yuuummmm. Those look so good!
ReplyDeleteAnd, I can't believe your mom was at the conference I was at. That's awesome. I wonder if I talked to her! ha. I hope she enjoyed it as much as I did. It was wonderful.
The cookies look wonderful, hope I get to try one. Slow down there Mark! Aunt Connie always made amazing chocolate chippers... I wonder if this is the technique she used? How do you sign up for the prize? I missed that part! :)
ReplyDeleteHi, I'm stopping by from SITS! I just wanted to share a bit of comment love.♥
ReplyDeleteThanks for sharing this recipe. Those cookies look divine! One word of caution from the mom and medic in me. If you let the eggs sit until they are room temperature, PLEASE be careful about eating the cookie dough! You are just begging for a terrible case of Salmonella. It is always a chance you take when you eat raw cookie dough, but it is much more risky when you eat it after the eggs have been sitting out!
I hope I have not offended you. I just wanted to mention it. I hope the rest of your week is absolutely amazing!
Teresa <><
http://toomanyheartbeats.blogspot.com
I'm about to try out your recipe! Wish me luck, I'm not the best baker or cook! :)
ReplyDeleteLeslie